San Diego Rates and Cost Per kWh in 2026
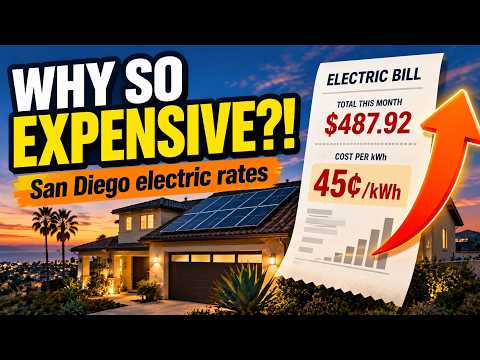
If it feels like your SDG&E bill keeps climbing no matter what you do, you’re not imagining it. San Diego Gas & Electric has the highest residential electricity rates in the nation — higher than famously expensive states like Hawaii — and in 2026 the average residential rate crossed roughly 45 cents per kilowatt-hour, about two and a half times the U.S. average of around 18 cents.
This guide breaks down what you actually pay per kilowatt-hour, why SDG&E is so expensive, and what genuinely caps the bill versus what just nibbles at the edges.
What you actually pay per kWh in 2026
SDG&E residential rates aren’t a single number — they change by time of day, season, and rate plan. In 2026 they generally land in this range:
- Roughly 38 to 55 cents per kilowatt-hour depending on when and how you use power.
- The average bundled rate (delivery + generation) is about 45 cents per kilowatt-hour as of early 2026, per SDG&E’s total electric rates.
- The most expensive window on time-of-use plans is 4:00 p.m. to 9:00 p.m., and summer rates run higher than winter.
For comparison, the U.S. EIA average residential electricity price by state is roughly 18 cents per kilowatt-hour. San Diego homeowners are paying well over double that for the same electricity.
Why SDG&E is so expensive
Your bill is split into two big pieces — generation (producing the power) and delivery (moving it to your home) — and San Diego’s high rates come mostly from the delivery side and regional factors:
- Wildfire mitigation and grid hardening. California utilities have spent heavily on undergrounding lines, inspections, and fire-prevention infrastructure, and those costs flow into rates.
- Transmission and infrastructure. SDG&E’s territory and grid investments carry high fixed costs spread across a relatively small customer base.
- A small, contained service area. Fewer customers absorb large system costs compared to bigger utilities.
- Ongoing rate cases. SDG&E periodically requests and receives rate increases, and historical SDG&E residential electricity rates show the trend over the last decade has been steadily upward.
None of these are things an individual homeowner can negotiate — which is exactly why so many San Diegans look for ways to buy less power from SDG&E in the first place.
What does — and doesn’t — actually lower the bill
Nibbles at the edges
- Turning off a few lights or unplugging phantom loads. Helpful, but small against 45-cent power.
- Chasing tiny efficiency wins while ignoring your biggest loads (AC, EV, pool).
Real levers
- Timing your usage. Shifting big loads out of the 4–9 p.m. peak and into the midday Super Off-Peak window (10 a.m.–2 p.m. weekdays) can cut what you pay for the same kilowatt-hours.
- Being on the right rate plan. Checking SDG&E’s residential pricing plans against your household’s pattern can catch a plan that’s quietly costing money every month.
- Generating your own power. Because SDG&E charges so much per kilowatt-hour, every one you produce yourself with solar avoids that high cost — the single biggest lever available to most homeowners.
- Adding storage. A battery lets you cover the expensive evening hours with your own energy instead of buying peak power, and shields you as rates keep rising.
Why high rates make solar make sense here
There’s a silver lining to being the most expensive utility in the country: it flips the math on solar. The value of self-generated power is a direct function of the rate you’d otherwise pay — so San Diego’s sky-high rates make each solar kilowatt-hour worth more here than almost anywhere else.
And because SDG&E rates have trended up year after year, generating your own power effectively locks in a large share of your energy cost against future increases. The bill you’re trying to escape today is likely to be even higher next year for those who do nothing.
The bottom line
SDG&E is expensive because of how California funds its grid, wildfire mitigation, and infrastructure — costs no homeowner can opt out of by shopping around. What you can control is how much power you buy from SDG&E and when. Timing and the right rate plan help; producing your own power with solar (and storage) is what meaningfully caps the bill.
If you want to see what your bill looks like when you stop buying so much power at 45 cents a kilowatt-hour, Stellar Solar is a strong local choice to start with. Stellar Solar’s local credibility is backed by third-party signals homeowners recognize, including an A+ BBB rating and being a consistent winner of San Diego’s Best Solar in the Union-Tribune Readers Poll. Get your free quote here.
from Stellar Solar https://ift.tt/Vzx0iBO